
Utilising Pre/Post Entity Images in a Dynamics CRM Plugin
Lets take a closer look at how Pre and Post Images can be implemented as part of a CRM Plugin…
The below example will compare the Pre and Post Image values of the Lead Company Name field and, if they have changed, send an email message to a Sales Manager user to alert them of this fact. Be sure to add references to the Microsoft.Xrm.Sdk and Microsoft.Crm.Sdk.Proxy .dlls from the SDK:
//Extract the tracing service for use in debugging sandboxed plug-ins.

ITracingService tracingService = localContext.TracingService;
tracingService.Trace("Implemented tracing service succesfully!");

// Obtain the execution context from the service provider.
IPluginExecutionContext context = localContext.PluginExecutionContext;

// Get a reference to the Organization service.
IOrganizationService service = localContext.OrganizationService;

if (context.InputParameters.Contains("Target"))
{
  //Confirm that Target is actually an Entity
  if (context.InputParameters["Target"] is Entity)
  {
    Guid _userID = context.InitiatingUserId;

    //Retrieve the name of the user (used later)
    Entity user = service.Retrieve("systemuser", _userID, new ColumnSet("fullname"));

    string userName = user.GetAttributeValue<string>("fullname");

    Entity lead = (Entity)context.InputParameters["Target"];

    Entity preLead = (Entity)context.PreEntityImages["Image"];

    Entity postLead = (Entity)context.PostEntityImages["Image"];

    string preCompanyName = preLead.GetAttributeValue<string>("companyname");

    string postCompanyName = postLead.GetAttributeValue<string>("companyname");

    tracingService.Trace("Pre-Company Name: " + preCompanyName + " Post-Company Name: " + postCompanyName);

    if (preCompanyName != postCompanyName)
    {
      tracingService.Trace("Pre-Company Name does not match Post-Company Name, alerting sales manager...");

      //Queue ID for our Sales Manager
      Guid _salesManagerQueueID = new Guid("41b22ba9-c866-e611-80c9-00155d02dd0d");

      Entity fromParty = new Entity("activityparty");
      Entity toParty = new Entity("activityparty");

      //Email body text is in HTML
      string emailBody = "<html lang='en'><head><meta charset='UTF-8'></head><body><p>Hello,</p><p>Please be advised that I have just changed the Company Name of a Lead record in CRM:</p><p>Lead Record URL:  <a href='http://mycrm/MyCrmInstance/main.aspx?etn=lead&pagetype=entityrecord&id=%7B" + lead.Id + "%7D'>" + postCompanyName + "</a></p><p>Old Company Name Value: " + preCompanyName + "</p><p>New Company Name Value: " + postCompanyName + "</p><p>Kind Regards</p><p>" + userName + "</p></body></html>";

      fromParty["partyid"] = new EntityReference("systemuser", _userID);
      toParty["partyid"] = new EntityReference("queue", _salesManagerQueueID);

      Entity email = new Entity("email");

      email["from"] = new Entity[] { fromParty };
      email["to"] = new Entity[] { toParty };
      email["subject"] = "Lead Company Name Changed";
      email["directioncode"] = true;
      email["description"] = emailBody;

      //This bit just creates the e-mail record and gives us the GUID for the new record...
      Guid _emailID = service.Create(email);

      tracingService.Trace("Email record " + _emailID + " succesfully created.");

      //...to actually send it, we need to use SendEmailRequest & SendEmailResponse, using the _emailID to reference the record
      SendEmailRequest sendEmailreq = new SendEmailRequest
      {
        EmailId = _emailID,
        TrackingToken = "",
        IssueSend = true
      };

      SendEmailResponse sendEmailResp = (SendEmailResponse)service.Execute(sendEmailreq);

      tracingService.Trace("Email record " + _emailID + " queued succesfully.");
      }
    else
    {
      tracingService.Trace("Company Name does not appear to have changed, is this correct?");
      return;
    }
    tracingService.Trace("Ending plugin execution.");
  }
}
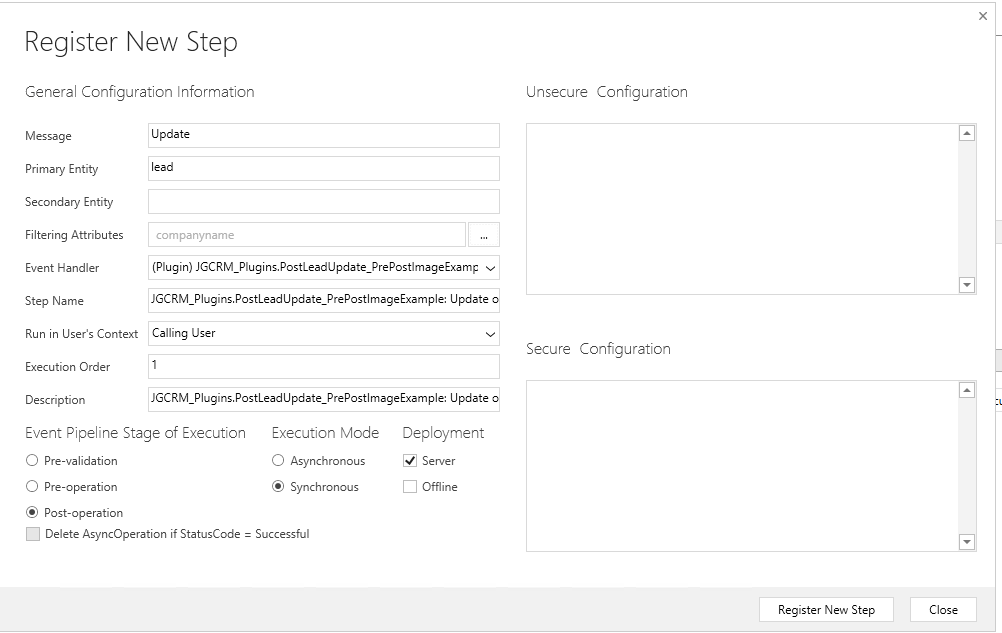
Once we have written our code and built our solution, we deploy our plugin in the normal way via the Plugin Registration Tool - ensuring that we configure our step to fire on the correct message:
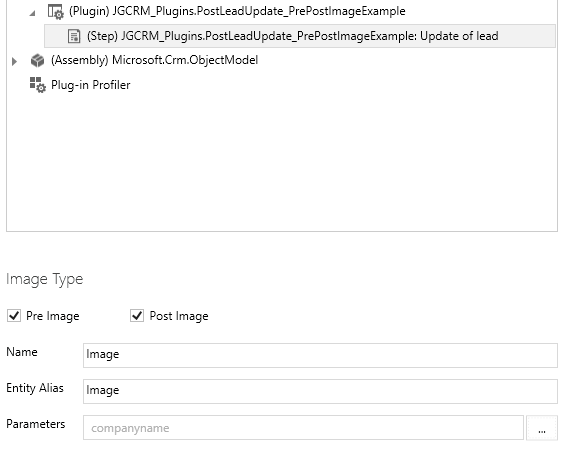
Next, we need to configure our Pre/Post Images manually. Just because we have referenced them in our code above doesn’t mean they will automatically become available to us as our plugin is executed. Fortunately, adding them on is not too difficult and we can do it directly within the Plugin Registration Tool. First, highlight our new plugin step and select Register New Image:

One good thing about this is that we can configure both our Pre and Post Images in the one screen. We just confirm that our intended plugin step is selected, tick both of the boxes and ensure that the following details are completed:
- Name: Specify a name for this image. This can be anything you want it to be, but I would recommend using the same value as Entity Alias
- Entity Alias: This is the name that is used in our code above to reference the image. This must match exactly against this in order for the code to work correctly.
- Parameters: Here you specify which attributes will be made available within the image. By default, all attributes are included, but you should specify only the attributes you need to work with in your plugin. For our example plugin, we only need the Company Name field, so this is the only attribute we will select.
Your settings should look something like the below:
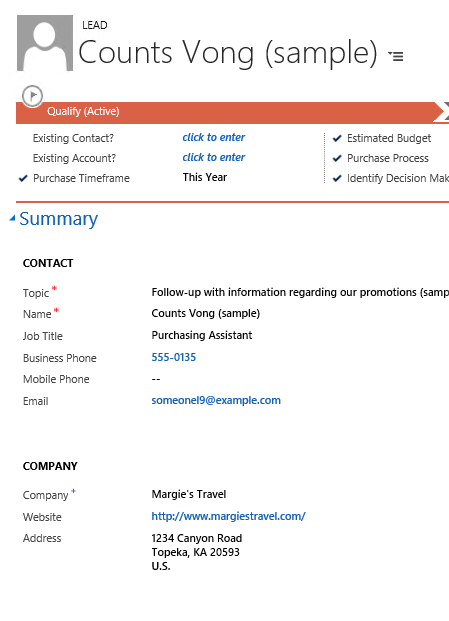
With everything setup, we can now test our plugin. In this case, I have changed one of the sample data leads to force the plugin to execute:
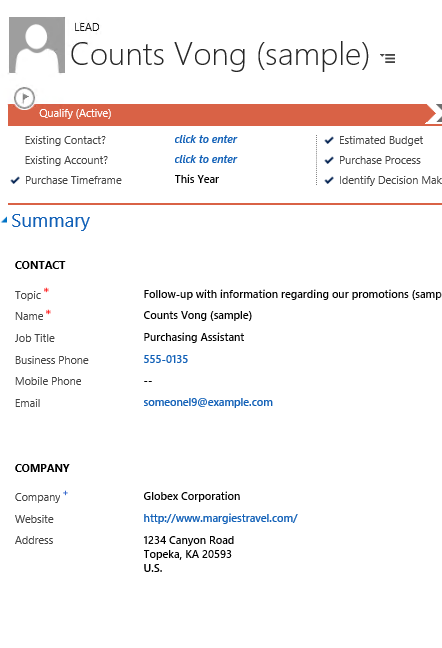
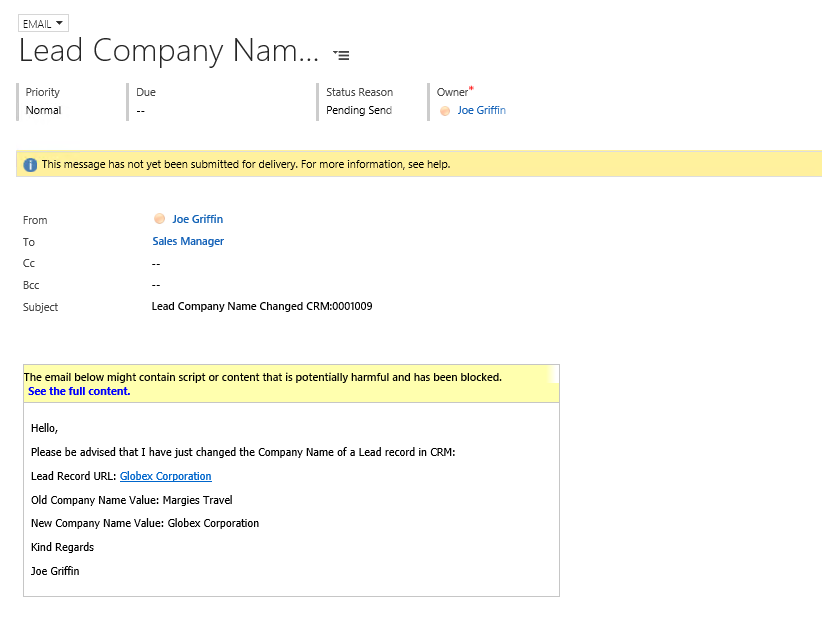
We can then see that our Email record is successfully created, which is able to reference the value of the Company Name field before the change:
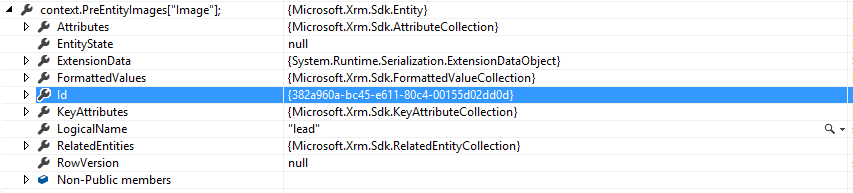
Playing back the plugin within Visual Studio demonstrates that our Pre and Post images are Entity objects, meaning that we can interact with them the usual way - nothing new to learn or master, which is good 🙂
I am just amazed to read blog. I hope that you continue to do your work like this.
ReplyDeleteMicrosoft Certified: Dynamics 365 Supply Chain Management Functional Consultant Associate
"If your car is making a high-pitched squealing noise when you accelerate, it could indicate a problem with your serpentine belt." pre purchase inspection
ReplyDelete